How are shoes sewn? A glance into a shoemaker’s workshop

Today we’ll show you how healthy and comfortable shoes are sewn right here in our workshop, where we’ll make a brand-new pair of Pura sneakers.

Like viewing more than reading? No problem – we’ve recorded the production process step by step.
Each pair of our shoes passes through the hands of these wonderful people
For years, we produced Ahinsa shoes here in the Czech Republic and we did well at it – but we also had our limitations. We couldn’t find people to fill in for us in the case of an emergency.
When a situation like this arose, we were left without help. An important member of our team unexpectedly ended up in the hospital and none of us knew how to do her job.
Fortunately, we found this excellent Croatian team just in the nick of time.
Goran’s family has been sewing shoes for decades. The moment we saw their work, our minds were made up. Goran and his crew produce shoes more quickly, precisely and reliably than we could. They simply understand the craft like few others do.
And so these Croatian shoemakers became a part of the Ahinsa shoes team.

This is our dream team.
Going into the warehouse: Indestructible vegan materials
Let’s start in the warehouse, where roles of materials await us. All the materials are ethical and (almost) indestructible. Today we’ll be sewing shoes from our favorite material: CF+ vegan leather.
Don’t think of imitation leather. CF+ is a special microfiber that breathes and can withstand unbelievable things. We’ve tried scratching it with a fork, scuffing it and soaking it in the sea (don’t ask why), and it withstood everything.
Interested in materials that are nature-friendly? Read the article Better than leather. What are immortal vegan shoes made from?
Preparation: We cut out the individual segments like cookies
We have the material – now we’ll cut out the segments. The process looks a bit like cutting cookies. We had these sharp “cookie cutters” specially made, and we arrange them to leave the smallest amount of excess clippings as possible.

Do you see those white pieces? Those are the segments that we’ll use to sew the shoes.
We thin the edges and tips of each piece on a special machine. Once we bend the segments, they’ll fit together perfectly and the folds won’t create ugly bulges.
Here you can see how our colleague Ivana is thinning the segments.

We thin the tips so they won’t be a nuisance later.
Sewing: The shoes now have a shape!
Let’s get sewing! We use machines that will reliably sew together stiff and strong material. Using a machine called a Strobel, we’ll sew the insole onto the upper material. The shoe is starting to look a bit more like a shoe. It now has a shape.
Not everyone knows how to operate a Strobel – it’s a pretty complex little machine. Here you can see Štefica using it skillfully.

We use the Strobel to sew the upper material onto the insole.
Lace holes and eyelets
We sew on the tongue and glue on foam trimming where we need to soften the shoe. Now it’s time for the laces.
First we punch little holes into the shoe and place eyelets in them. Then we stamp them so they’ll hold fast.
The shoe is still far from being finished, but we can now tie the laces into a nice bow.

Tihana uses the hole-punch to make holes for the laces.

We place the eyelet into the hole and stamp it so it holds.
The shoe-last: You need strong muscles to shape a shoe
We then fasten the sewn and laced shoe onto the shoe-last. We use our own shoe-lasts, because traditional ones are too narrow. People have fallen in love with Ahinsa shoes because they have generous space for the toes.
Fastening the shoe onto the shoe-last isn’t easy. It takes proper muscle and a few well-aimed blows from a hammer. Once the shoe finally sits correctly, it now has the proper shape.
Wondering what the hammer’s for? Sometimes it’s necessary to tap the seams to smooth them out and make the shoe sit nicely.
Here you can see our colleague Renato. A few hours of this and he won’t need to visit the gym.

Renato smooths the seams with a small hammer so the shoe sits nicely.
Preparing the sole: Marking, sanding and glueing
We attach the sole to the shoe and mark where it will be attached. Then we put tape along this line. The tape helps prevent the shoe from being scratched or dirtied above the sole.
We sand the area where the sole will be attached so the glue holds tightly. This is called roughing.

Matija puts tape around the shoe to prevent it from being scratched during the roughing process.

Denis is roughing the shoe so the glue will hold tightly to it.
Glueing: By using a press, the soles will hold fast.
Have your shoes ever come unglued? We hate that. That’s why we glue these soles in a way that will simply now allow this to happen.
We apply reliable glue to the coarsened surface and sole. We tested various types and ended up selecting ecological glue from Germany.
We put the sole and shoe into an oven for a while. There, the glue warms up and activates. That’s why we don’t recommend drying your shoes on the radiator: the warmth could reheat the glue and make it unstick.

Denis puts the shoe into the activation oven.
It’s a bit of a science to correctly activate the glue. Each glue and each material requires a different temperature and duration in the oven.
Then we glue the sole onto the shoe and compress the two parts together with a special press. We had it custom made, because it makes sure the sole holds tight. For good.

We glue the sole to the shoe and press the two parts together with a press.
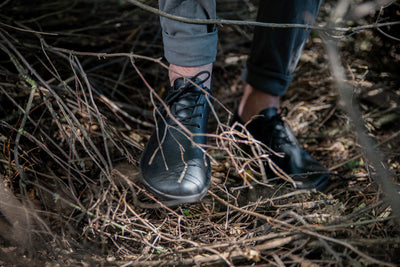
Hooray, we have a shoe!
The Pura sneakers are done! But wait – there’s one more thing before we ship them off to you.
- We check to make sure they’re flawless. Only perfect shoes can be sent to you.
- We put an insole inside.
We have two types of insoles: Barefoot for enthusiasts of barefoot walking and Comfort insole that goes along with a thin layer of Technogel for those of you who like stepping down softly.
We lace up the sneakers nicely and add our label. Then they’re read to be shipped to you and they’re looking forward to meeting their new owners.
Are you looking forward to them too?


Other interesting articles


![[A big guide to] Choosing barefoot shoes that fit you right](http://ahinsashoes.com/cdn/shop/articles/navod_email_{width}x.jpg?v=1668081763)
![[A big guide to] Choosing barefoot shoes that fit you right](http://ahinsashoes.com/cdn/shop/articles/navod_email_400x.jpg?v=1668081763)


